_edited_edited.png)
You’re Protecting Your Boat Vinyl Wrong
- Margarita Xistris
- 15 hours ago
- 3 min read

Most boat owners wipe down their vinyl seats and think the job is done.
After years of working on boats, we can tell you this: clean vinyl and protected vinyl are not the same thing.
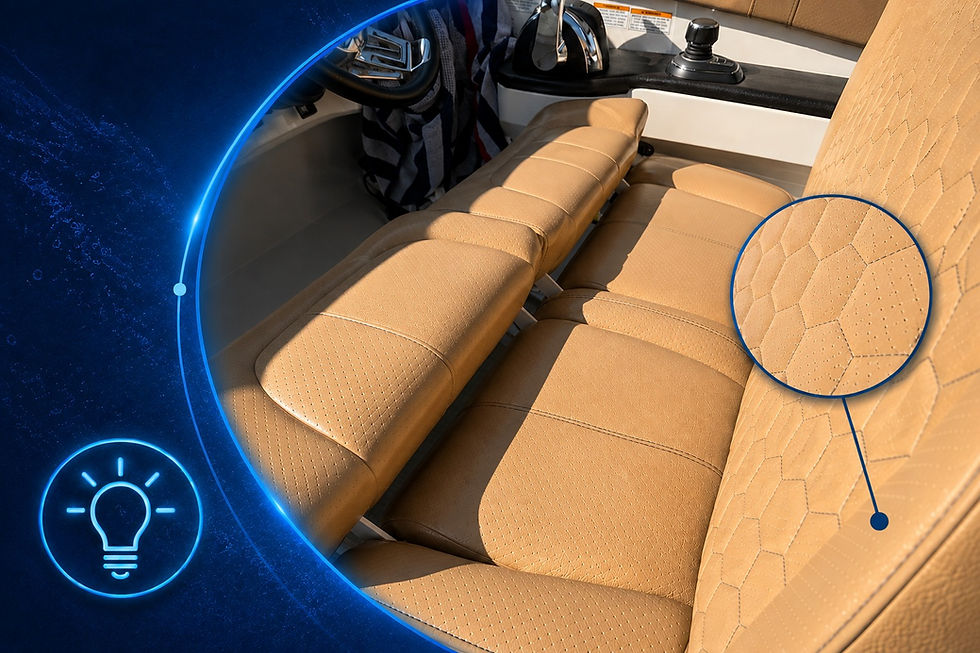
Vinyl may look smooth from a distance, but up close it has texture, stitching, seams, and small grooves that collect buildup over time. Sunscreen, body oils, salt, moisture, dirt, and old product residue can settle into those details. A quick wipe may make the surface look better for the moment, but it does not always prepare the vinyl for long-term protection.
That is where proper prep and ceramic coating make a difference.
It Starts Before the Coating Goes On
Ceramic coating is not something we just apply over dirty vinyl.
Before coating, the surface needs to be properly cleaned and inspected. If there is an old coating, old dressing, or product residue still sitting on the vinyl, it has to be removed first. Otherwise, the new ceramic coating may not bond evenly.
This step matters more than most people realize.
If the vinyl is not properly prepped, you are not really protecting the surface. You are just layering product over buildup.
For this project, the old coating was removed first. Then the vinyl was cleaned and prepared before applying a fresh ceramic coating. That gives the coating a better surface to bond to and helps create a cleaner, smoother final result.
Why Ceramic Coat Vinyl?
Most people think ceramic coating is only for gelcoat or paint.
But vinyl can benefit from protection too, especially on boats where seats are constantly exposed to use, moisture, and the marine environment.
A properly applied ceramic coating can help make vinyl easier to maintain. It creates a protective layer that helps reduce how much dirt and buildup cling to the surface. That does not mean the vinyl becomes maintenance-free, but it can make regular cleaning easier and help the surface stay cleaner between services.
The goal is not to make vinyl shiny or slippery.
The goal is to help protect the material while keeping it looking clean, refined, and properly maintained.
The Step Most People Forget: Curing
Here is the part many boat owners do not think about.
Once ceramic coating is applied, the job is not finished immediately. The coating needs time to cure.
Freshly coated vinyl surfaces should not touch each other during the curing period. If seats are folded, closed, or pressed together too soon, the treated surfaces can stick together and affect the finish.
That is why we make sure coated areas stay separated while the coating cures.
It sounds simple, but this is the kind of detail that separates a rushed job from a professional one.
Ceramic coating is not just about applying the product. It is about cleaning correctly, prepping correctly, applying correctly, and letting the coating cure correctly.
The Real Lesson
Boat vinyl takes a lot more abuse than most people notice. It is touched, sat on, wiped down, exposed, covered, uncovered, and used season after season.
If you want vinyl to look its best, do not just wipe it down and call it finished.
Clean it properly. Remove old buildup. Prep the surface. Apply protection the right way. Then give it time to cure.
That is how you get a finish that does not just look clean in the moment but feels properly cared for afterward.
Small details make the final result.
And with vinyl, those details matter.
Have a Question?
Have you ever struggled to remove bird droppings from your teak, or do you have a maintenance tip that works well for you?
We'd love to hear your experience.
If you have questions about teak maintenance, boat detailing, or protecting your vessel, feel free to contact our team or send us an email. We're always happy to help fellow boat owners.
For more practical boat care tips, follow us on social media:
📘 Facebook: https://www.facebook.com/Nauticaldetails
📸 Instagram: https://www.instagram.com/nauticaldetails/
⚓ Restore Once. Preserve For Years.

Comments